Menu

Domino's Style Molten Choco Lava Cake in Pressure Cooker Recipe

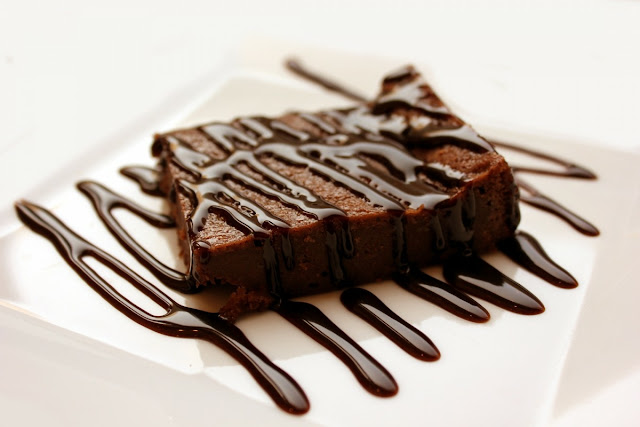
Molten Choco Lava Cake is a very easy and delicious recipe. To get the Molten lava you will just have to follow each and every step according to the recipe mentioned below. This is mainly a pressure cooker recipe however if you want you can also make this recipe in an electric oven for that see notes below. 

eggless choco lava cake recipe, choco lava cake recipe without oven, choco lava cake recipe by domino's, choco lava cake recipe in microwave, eggless choco lava cake recipe by pankaj, choco lava cake recipe in hindi, eggless choco lava cake recipe by sanjeev kapoor, choco lava cake domino's, eggless choco lava cake recipe, chocolate lava cake recipe masterchef, choco lava cake recipe without oven, choco lava cake recipe by domino's, choco lava cake domino's, lava cupcake recipe, lava cake recipe microwave, choco lava cake recipe in microwave,eggless choco lava cake recipe by pankaj, eggless choco lava cake recipe by sanjeev kapoor, eggless choco lava cake domino's recipe, choco lava cake recipe in microwave, choco lava cake recipe without oven, how to make choco lava cake at home, eggless choco lava cake in cooker, eggless choco lava cake with condensed milk, choco lava cake recipe without oven in hindi, choco lava cake in cooker in hindi, how to make choco lava cake at home without oven and egg, how to make choco lava cake domino's, choco lava cake recipe in microwave, how to make eggless chocolate cake in pressure cooker in hindi, eggless choco lava cake recipe by pankaj, choco lava cake recipe eggless masterchef, Molten Lava Cake In Cooker Recipe without Egg, YouTube ·Lava Cake in Cooker Recipe | Pressure Cooker Chocolate Lava Cake | Eggless, Choco lava cake recipe video, Eggless Choco Lava Cake in Microwave in 2 Minutes – Chocolate Fondant Cake, biscuit cake recipe, Chocolate (Food), chocolate cake in microwave, chocolate fondant cake in microwave, chocolate lava cake, easy Quick, eggless, eggless choco lava cake recipe in microwave, eggless lava cake recipe, lava cake, lava cake in microwave, molten cake, Molten choco lava cake recipeMolten Chocolate Cake (Food), molten lava cake without egg, molten lava cake without oven, oreo cake in microwave, recipe molten lava cake microwave, without eggs,
Prep time
10 mins
Cook time
20 mins
Total time
30 mins

Author: Neha Sharma

Ingredients-

  • Butter- 2 Tbsp (Room Temperature)
  • Cocoa powder- 4 Tbsp
  • Milk- 3/4 Cup (Room Temperature) 
  • Chocolate- 104 gms (you can use dairy milk)
  • 1/2 Tsp baking powder
  • All purpose flour/ Maida- 1/2 Cup
  • Castor Sugar/Powdered sugar- 1/2 Cup
  • Silicon baking cups/Molds
  • Strawberry- 2 to 3 (optional) 
  • Mint leaves- 2 to 3 (optional)
  • Icing Sugar- For garnishing (optional) 
  • Chopped Walnuts- 1/2 cup (optional) 

Method-

  1. Take a bowl, place a sieve/channi on top of it and sift all purpose flour (maida), cocoa powder, powdered sugar and baking powder to remove lumps. 
  2. Add 1/2 cup milk to the batter and mix it well.  
  3. In a microwave or double boiler melt chocolate, keep constantly stirring. 
  4. Add butter to the melted chocolate and mix it well. 
  5. Transfer the melted chocolate to the batter if using add chopped walnut and mix it well. Add the remaining milk to the batter and mix it again.
  6. Grease the silicon cups/moulds properly with butter and fill them 3/4th with the batter. After filling tap the moulds twice. 
  7. Spread salt in cooker (make sure to completely cover the base of the Cooker with salt) place a bowl or a stand in the cooker. Cover the lid and pre-heat it for 10minutes. (Remove the whistle and rubber).
  8. Once the Cooker is pre-heated place the silicon moulds on the stand. Cover the lid and let it cook for 10-12 mins on a medium-high flame.
  9. Once done take it out from the Cooker, let it rest for 2-3 minutes then demold. 
  10. Garnish with some strawberry, mint Leaves and icing sugar (optional). 

Notes:

* You can also prepare this recipe in oven for that pre-heat it at 185°C for 10 minutes.
* To check whether the cake is cooked or not (in pressure cooker or oven), shake the cooker  slowly and if centre part of the cake jiggles then the cake is cooked.

Low Carb Pan-Cake Recipe | Simple and Quick Pan Cake Recipe

Quick and Simple Low Carb pan cake recipe which doesn't require much time to cook and the end product is worth a try.

pancake recipe easy, delicious pancake recipe, pancake recipe without baking powder, pancake recipe for kids, pancake recipe without eggs, buttermilk pancake recipe, pancake recipe for one, thin pancake recipe, no carb protein pancakes,Low Carb with Jennifer, Protein Pancakes - Only 2 Ingredients, Low Carb Pancakes - Keto Pancake Recipe, Keto Low Carb Pancakes Recipe with Almond Flour & Coconut Flour, Keto Pancakes Recipe with Almond Flour, The Best Keto Pancakes, keto pancakes almond flour, keto pancakes coconut flour, keto pancakes protein powder, keto pancakes almond flour cream cheese, keto pancakes no cream cheese, keto pancakes dairy free, keto pancake syrup, keto pancake topping, keto pancakes cream cheese, keto pancakes almond flour cream cheese, keto pancakes coconut flour, keto pancakes protein powder, keto pancakes dairy free, keto pancakes cottage cheese, keto sour cream pancakes, keto pancake syrup, low carb pancakes almond flour, low carb pancakes coconut flour, low carb pancakes cream cheese, no carb protein pancakes, no carb pancakes recipe, low carb pancakes with protein powder, low carb pancakes banana, keto pancakes coconut flour, healthy pancake recipe without banana, healthy pancake mix recipe, healthy pancakes with oats, healthy pancakes banana, healthy pancakes without flour, healthy whole wheat pancake recipe, healthy protein pancakes,  tasty healthy pancakes, easy pancake recipe without baking powder and eggs, pancake recipe without baking powder and milk, how to make pancakes without baking powder and eggs, milkless pancakes without baking powder, pancakes without baking powder or baking soda or eggs, substitute for baking powder in pancakes, how to make pancakes without eggs and baking powder or baking soda, pancakes without flour or baking powder, easy pancake recipe without baking powder, fluffy pancake recipe, pancake recipe no egg, pancake recipe for kids,  delicious pancake recipe, pancakes,pancake recipe for one, easy pancake recipe no milk,What makes fluffy pancakes?, How do you make syrup at home?, easy pancake recipe without baking powder, fluffy pancake recipe, pancake recipe no egg, pancake recipe for kids, delicious pancake recipe, pancakes, pancake recipe for one, easy pancake recipe no milk, how do you make batter for pancakes?

Prep time
5 mins
Cook time
10 mins
Total time
15 mins
Servings: 2 to 3
Author: Neha Sharma

Ingredients-

  • Butter- 1 tbsp
  • Eggs- 4
  • Cream cheese- 1 1/2 cup (About 140 gms) 
  • Grated Coconut- 2 tbsp (optional) 
  • Honey- 4 to 5 tbsp or as required

Method-

  1. In a bowl add Eggs and cream cheese beat the mixture with a fork or blender until creamy.
  2. Add grated coconut (if using) and honey to the egg and cream mixture, mix it well. Keep it aside for 5 minutes.
  3. In a non-stick pan, heat some butter on a medium flame. 
  4. Once the butter is hot, add the pan cake mixture in portions (you can make 2 large size pan cakes or 4 medium size so divide and use the mixture accordingly). 
  5. Cook for 2 minutes then turn and cook for further 1-2 minutes or until cooked through. Transfer to a plate. Cover loosely with foil to keep warm. Repeat with remaining mixture, greasing pan with butter. 
  6. Garnish with grated coconut/fruits/nuts and drizzle a tbsp of honey on top.

Bourbon Biscuit No Bake Cake Recipe

This recipe is from my mom's kitchen and it is a very quick recipe as it does not require baking or cooking all you have to do is to refrigerate the cake batter for 2 to 3 hours and that's it your bourbon biscuit no bake cake is ready. While serving you can also drizzle some hot chocolate syrup on top with a scoop of vanilla ice cream. Everytime I try this recipe it tastes delicious so thought of sharing it with all of you. 

 bourbon biscuit cake in pressure cooker bourbon biscuit cake in microwave bourbon biscuit recipe bourbon biscuit birthday cake how to make bourbon biscuits at home eggless biscuit cake recipe in hindi bourbon biscuit cake eggless bourbon biscuit cake in cooker, Bourbon Biscuit No Bake Cake Recipe

Prep time
10 mins
Cooling time
3 hours
Total time
3 hours 10 mins
Author: Neha Sharma

Ingredients:

  • Bourbon biscuits- 10 to 12
  • Dairy Milk Chocolate- 6 to 8 cubes
  • A block of butter
  • Honey- 2tbsp
  • Milk- 1/4 cup or as needed
  • Chopped Nuts/Choco Chips or Tutti Fruity (optional) 

Method:

  1. Melt the chocolate, honey and butter (each separately) in microwave or on double boiler and mix together. 
  2. Grind / crush the bourbon biscuits to fine powder.
  3. Mix the biscuits and chopped nuts with the melted honey, Chocolate and butter mixture. 
  4. Add milk to the mixture and mix well, till you get a slightly thick consistency.
  5. Line a container with clingfilm, leaving enough to fold over when full
  6. Tip the mixture into the container. Refrigerate for 3 hours
  7. Drizzle some chocolate syrup on top and serve with a scoop of Vanilla ice cream.
  8. Enjoy!! 😃

Low Carb Egg Muffins in Pressure Cooker Recipe | Ketogenic Recipes

Delicious and Healthy Egg Muffins is a simple recipe with great taste. This recipe is low in carbs and high in protein. Perfect to be served as breakfast or evening snack along with a cup of your favourite tea. 

Low Carb Egg Muffins in Pressure Cooker Recipe,  Ketogenic Recipes, Muffin recipe, Low Carb, weight lose recipes,vanilla muffin recipe,  chocolate muffin recipes,  blueberry muffin recipes,  chocolate chip muffin recipes,  cinnamon muffin recipe,  plain muffin recipes,  best muffin recipe,  easy muffin recipe for kids,healthy banana muffin recipes basic healthy muffin recipe,  healthy oatmeal muffin recipes,  healthy blueberry muffin recipes,  healthy breakfast muffins, protein healthy breakfast muffins low calorie healthy breakfast egg muffins healthy pumpkin muffins,  low carb muffins with almond flour low carb muffins coconut flour high protein low carb muffins recipe low carb blueberry muffin recipe low carb cinnamon muffins keto muffins blueberry low carb savoury muffins keto muffins coconut flour, spinach egg muffins breakfast egg muffins cups egg muffins paleo healthy breakfast egg muffins with spinach egg muffins keto breakfast egg muffins with bacon egg muffins slimming world breakfast egg muffins with hash browns

Prep time
10 mins
Cook time
20 mins
Total time
30 mins
Servings: 1-2
Author: Neha Sharma

Ingredients-

  • Capsicum- 1 (Finely Chopped) 
  • Onion- 1 (Finely Chopped)
  • Tomato- 1 (Finely Chopped)
  • Eggs- 6
  • Chopped spinach- 1/2 cup (you can also use chopped coriander depending upon the availability) 
  • Any Cheese- 50 gms (optional) 
  • Sea Salt- To taste
  • Black pepper- 1/4 tbsp
  • Chilli Sauce- 2 tbsp
  • Muffin tins- (Easily available online or in bakeries) 
  • Muffin cups- (Easily available online or in bakeries) 

Method-

  1. Spread salt in cooker (make sure to completely cover the base of the Cooker with salt) a stand in the cooker. Cover the lid and pre-heat it for 15 minutes on a medium high flame (Remove the whistle and rubber).
  2. In a bowl, add all the chopped vegetables (Onion, tomato, capsicum/coriander) and cheese if using. Mix it well. 
  3. In another bowl, beat eggs then add salt, black pepper and Chilli Sauce. Mix it well and transfer this mixture to the veggies bowl. Again mix well.
  4. Place 1 muffin cup in each muffin tin. 
  5. With a spoon, pour the egg and veggies mixture into each tin equally and spread it evenly. Sprinkle some cheese on top (if using). 
  6. Place the muffin tins on the stand in the pre-heated cooker (make sure not to overload the cooker with Muffins). 
  7. Cover the pressure cooker with lid (without whistle and rubber) and bake it for 18-20 minutes on medium flame. 
  8. Serve hot or at room temperature.

Notes:

* If using oven preheat to 200°C/ 390°F and then bake the Muffins for 20-25 minutes (Make sure to check it in between).
* You can also saute the chopped veggies in 1/2 tbsp of oil/butter before adding it to the egg mixture.

Home-made Jim Jam Biscuits/Cookies in Pressure Cooker Recipe

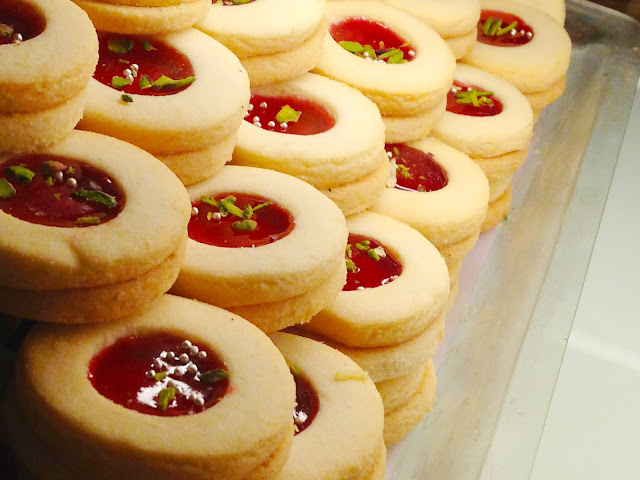
Home-made Jim Jam Biscuits recipe is dedicated to all the kitchen monsters (kids). This recipe is very easy to make and can be stored effortlessly. There is no need to buy cookies from market when you can quickly make it all by yourself. 

jim jam cookies recipe, jim jam biscuits price, jim jam biscuit ingredients, jim jam biscuit recipe, britannia treat jim jam biscuits, jim jam biscuits wiki, jim jam biscuits online, parle jim jam, jim jam biscuits price, jim jam biscuits wiki, jim jam biscuits ingredients, britannia treat jim jam biscuits,jim jam biscuits online, jim jam biscuit ingredients, parle jim jam, jim jam biscuit buy online, Jam biscuits india, jim jam biscuits price, how to make jim jam biscuit, jim jam cookies recipe, jam filled biscuits, jim jam biscuit ingredients, jam drop biscuits recipe, recipe for jam cookies, jim jam biscuit, jam biscuits india, easy eggless jam cookies, jim jam biscuits price, jam cookies recipe indian, jam biscuits recipe, jim jam biscuit ingredients, jam cookies no egg, jam biscuits india, jim jam biscuit, eggless jam drop biscuits, jam biscuits recipe, jim jam biscuits price, eggless chocolate thumbprint cookies, jam cookies no egg, shortbread jam biscuits, How to make jim jam cookies, jim jam biscuits price, jim jam biscuit ingredients, jim jam cookies recipe, jam biscuits india, JIM JAM COOKIES ( BAKED IN COOKER), butter cookies recipe in pressure cooker, how to make biscuits in pressure cooker, how to make chocolate cookies in pressure cooker, maida biscuits in pressure cooker, how to make biscuits in pressure cooker in hindi, how to make atta biscuits in cooker, how to make biscuits in idli maker, biscuits recipe without oven in hindi, How to make Cookies in Pressure Cooker-How to make Cookies/Biscuits without oven-Cookies in Cooker, Jim Jam Cookies Recipe. How to make Jim Jam Cookies

Prep time
15 mins
Cook time
15 mins
Total time
30 mins
Author: Neha Sharma

Ingredients-

  • Maida/All purpose flour- 150 gms
  • Castor Sugar/Powdered Sugar- 3 tbsp
  • Unsalted Butter- 60gms (melted)
  • Baking Powder- Just a Pinch
  • Condensed Milk- 2 tbsp
  • Mixed Fruit Jam- For filling
  • Salt- Just a Pinch
  • Wire Stand/Idli Stand/Baking tin
  • Cookie Cutter

Method-

  1. Take a bowl and mix all the ingredients (Maida, Powdered Sugar, Salt, Baking Powder, melted butter, Condensed milk).
  2. Knead it and make a dough. (Dough should not even too soft or too stiff).
  3. Cling wrap the dough and refrigerate for 15-20 mins prior to rolling it out. 
  4. Now take an orange size ball from the dough and with help of a rolling pin roll 1/2 inch thick chapati.
  5. Cut the cookie dough into circular shapes for the lower layer and doughnut shape for the top layer (For the top layer use round cookie cutter and cut the cookies,for top layer take a small cutter/bottle cap and cut the cookies from centre).
  6. Take a pressure cooker, remove the whistle. Put salt to completely cover the base of cooker (2 cup).
  7. Switch on the flame cover the Cooker with lid and pre heat for 10 minutes on a high flame.
  8. Grease the idli stands or baking tin with butter and dust with some flour/Castor Sugar. keep both the lower and top layer of the cookies in the greased tin/idli stand separately (See Notes below). 
  9. Set the idli stand/Baking tin inside the cooker, cover the lid, cook it on low flame for 15 mins (See notes below).
  10. After 15 mins take out the stand from pressure cooker and let it cool down at room temperature (please be careful with this step otherwise you might burn your hand) 
  11. After the Cookies are cold demould them by using a knife (Cookies will be bit soft when you will take it out from cooker but after few minutes it will turn crispy).
  12. Whip the jam thoroughly with a spoon to make it into a fine paste, Drizzle the doughnut shaped cookie with some sugar and layer the circular shaped cookies with jam.
  13. Place the sugar drizzled cookie on top of the jam layered cookie.
  14. Consume immediately or store them in an air tight jar/container. ðŸ˜Š

Notes:

* Keep 4 to 5 cookies at a time and maintain some distance between each of them, as it would increase in size after cooking).
* After 10 minutes check the cookies if not done cook it for further 5 minutes)
* Cookies will be done when it turns golden brown from the edges.
* If baking in an oven pre-heat the oven at 180 degrees and bake the cooking for about 20 minutes or until the edges turn golden brown.
* You can give any shape to your cookies.

Parle G Biscuit Cake Recipe in Pressure Cooker | Quick Cake Recipe

Quick and very easy parle g and oreo biscuits cake Recipe. You can also decorate it with whipped cream and your favourite toppings. The cake turns out to be very soft and moist and is a must try. 

 parle g biscuit cake in cooker, parle g biscuit cake in cooker in hindi, parle g biscuit cake without baking, parle g biscuit cake recipe in microwave, parle g biscuit cake recipe in pressure cooker in hindi, parle g biscuit cake recipe in cooker in hindi, biscuit cake recipe in hindi in cooker, biscuit cake recipe in cooker in marathi,  parle g cake in microwave, parle g biscuit cake in cooker, parle g biscuit cake in cooker in hindi, parle g biscuit cake without baking, parle g cake banana, parle g biscuit cake recipe in pressure cooker in hindih oreo and parle g cake, easy biscuit cake recipe, parle g biscuit cake recipe in oven,  parle g biscuit cake without baking,  marie biscuit cake in microwave,  biscuit cake in microwave convection,  bourbon biscuit cake in microwave,  instant biscuit cake, eggless biscuit cake recipe by sanjeev kapoor, hide and seek biscuit cake in microwave

Prep time
10 mins
Cook time
20 mins
Total time
30 mins
Servings- 4 to 5
Author: Neha Sharma

Ingredients-

Method-

  1. Grind/Crush the biscuits in a mixer.
  2. Take a bowl, transfer the biscuits powder in it and add castor sugar, Tutti Fruity. Mix well.
  3. Add baking powder and warm milk in small portions, mix well without forming lumps to get a smooth batter.
  4. Grease cake tin or bowl with butter and sprinkle some flour (any) or castor sugar on it. Tap to spread evenly. 
  5. Shift the cake mixture to greased cake tin/bowl. Tap it 3-4 times to spread the mixture evenly. Sprinkle some Tutti Fruity/Chopped nuts/Gems on it. 
  6. Place a stand or bowl in pressure-cooker, pre-heat the cooker for 5 minutes on high flame before placing the cake in it (remove whistle). 
  7. After 5 minutes, place the cake tin/bowl carefully inside the cooker. Cover the cooker with lid (remove the whistle) and let the cake cook for 30 minutes. 
  8. First 15 minutes on high flame and rest 15 minutes on low flame. 
  9. After 30 minutes insert a toothpick in the center of the cake to check if it is cooked. If it comes out clean, it is cooked. If not bake for another 5 minutes. 
  10. Once done, let it cool down completely. 
  11. After it is cooled, remove the cake from the tin. Run a knife around the edges and invert it on a plate. Cut the cake into equal portions or as desired.

Notes:

* You can also bake the cake in oven. Pre-heat the oven for 10 minutes at 180º C. Bake for 15-20 minutes or until the toothpick comes out clean.
* You can also microwave the cake for 10 minutes. 

Home-made Healthy Peanut Butter Recipe | Peanut Butter in 1 minute Recipe

  How it is made peanut butter, How do you make homemade peanut butter ice cream, Which is the best peanut butter, Is peanut butter good for working out,  healthy peanut butter recipe,  peanut butter recipe in hindi,  peanut butter recipe indian,  how to make healthy peanut butter,  creamy peanut butter recipe,  vegan peanut butter recipe,  easy peanut butter recipe, how to make peanut butter without food processor, peanut butter benefits, peanut butter recipe, peanut butter for weight loss, peanut butter for weight gain, peanut butter healthy, peanut butter bodybuilding, peanut butter nutrition, peanut butter uses, peanut benefits, peanut nutrition, peanut vs groundnut, peanuts for weight loss, peanut butter, peanut in hindi, peanuts calories, peanut tree, peanut butter khane ka tarika, peanut butter in hindi meaning, peanut butter called in hindi, peanut butter hindi name, peanut butter recipe in hindi, peanut butter benefits, peanut butter sandwich recipe in hindi, how to make peanut butter, peanut butter nutrition, peanut butter calories, sugar free peanut butter recipe, how to make peanut butter without oil, natural peanut butter, organic peanut butter, homemade peanut butter calories,

Prep time
5 mins
Total time
5 mins
Author: Neha Sharma

Ingredients-

  • Peanuts- 2 bowl (Roasted and de-skinned)
  • Salt- A pinch
  • Jaggery (Gudd) - 2 tbsp (Grated/Powdered) 

Method-

  1. Dry roast the Peanuts and remove the skin.
  2. In a grinder, add Peanuts, salt and Grated/Powdered jaggery (Gudd). 
  3. Grind (while taking small intervals) until it turns into a thick paste/butter (do not add water or oil at all). 
  4. Store the peanut butter in an air-tight container in refrigerator.
  5. Consume within 2 months. Enjoy!! 

Note:

* You can avoid adding jaggery if you don't prefer your peanut butter to be sweet.

Quick Mutton Biryani Recipe


This Quick Mutton Biryani Recipe is a very simple yet delicious way of preparing Biryani. Biryani is made in so many different ways across India. The recipe which I am sharing today gives you the flavour of market bought Biryani. It is the easiest way of preparing restaurant style Biryani at home. Dont forget to try chicken Biryani


Biryani Recipe, Easy and Simple Biryani Recipe, Mutton Biryani, Dumm Biryani, Biryani Recipes, How to make Mutton Biryani at home simple, how to make Mutton Biryani at home quickly, simple Biryani recipes, Biryani Recipe in a Cooker, Biryani Recipe for bachelor, Biryani Recipe on Induction, Mutton dishes, Yummy Biryani Recipe, delicious Biryani, quick Biryani, simple Biryani, hyderabadi Biryani, hyderabadi dum Biryani, Biryani Recipe at home, Cook Biryani at home, mughlai cuisine, hyderabadi rasoi, mughlai dish, Chicken dish, non veg Biryani, spicy chicken Biryani at home, spicy Mutton Biryani at home, home style Mutton Biryani, home style Chicken Biryani, traditional Mutton Biryani, muslims Mutton Biryani, Pakistan Mutton biryani

Prep time
30 mins
Cook time
50 mins
Total time
80 mins
Servings: 4
Author: Neha Sharma

Ingredients-

  • Mutton- 1 kg (Cut)
  • Basmati Rice- 500 gms
  • Red Chilli powder- 1 tbsp
  • Garam Masala- 1 tbsp
  • Turmeric Powder- 1 tbsp
  • Ginger Garlic Paste- 8 tbsp
  • Green chilli paste- 3 tbsp
  • Curd/Yogurt- 1 cup (Beaten) 
  • Fried onions- 2 cup
  • Coriander Leaves- 2 cup
  • Tomatoes- 1/2 cup (Chopped) 
  • Ghee- 6 tbsp
  • Cardamom- 4 green and 4 black
  • Cumin/Jeera- 2 tbsp
  • Bay leaves- 6
  • Cinnamon Stick- 8 (small) 
  • Cloves- 8
  • Green Chillies- 6
  • Salt- To taste
  • Saffron Strands/food colour-1/4 tbsp
  • Milk- 1/2 cup

Method-

  1. Wash and soak rice in warm water for 20 minutes, in a pan with boiling water(3-4 litres of water) add salt, 1 tbsp cumin, 4 clove, 3 bay leaves, 5 tbsp of Ginger Garlic Paste, 2 tbsp of green chilli paste, 4 cinnamon sticks, 1 tbsp ghee, 2 green and 2 black Cardamoms. Allow the water to boil for 3 minutes.
  2. Add soaked rice to the boiling water. Let it cook on a high flame for 12 minutes or until rice is 95% cooked.
  3. Once done drain the water using strained and let the rice cool down.
  4. In a big bowl take Mutton pieces, add the remaining Ginger Garlic Paste, Chilli paste, yogurt, garam masala, red chilli powder, 1 1/2 cup coriander leaves, remaining bay leaves, green and black Cardamoms, cloves, Cinnamon sticks, 1 cup fried onion, saffron strands/food colour, 2 tbsp of ghee, green chillies. Mix it well and keep it aside for 30 minutes.
  5. After 30 minutes, take a pressure cooker add the marinated mutton, chopped tomatoes and milk. At last add oil and mix it well. 
  6. Cover the lid and pressure cook the Mutton for 4 whistles, after 4 whistles let the pressure release on its own.
  7. To layer the Biryani take a new pan, layer half of Mutton gravy and top it with a layer of cooked rice (don't press the rice).
  8. Drizzle 1 tbsp of ghee, fried onions and coriander leaves. 
  9. Repeat the layers (at last you will have a layer of cooked rice along with ghee, fried onions and coriander leaves as topping). 
  10. Let it cook for 14 minutes ( 7 minutes on high flame and 7 minutes on low flame, do not pressure cook it). 
  11. Serve hot with Raita. 

Tandoori Chicken Recipe without Tandoor/Oven

Tandoori chicken is the mouth watering and a delicious recipe of North India. It is an authentic recipe which can be prepared at home without Tandoor or oven but it still tastes like the one we get in restaurants. 

Chicken tandoori, Tandoori Chicken Recipe, Tandoori Chicken without Tandoor/Oven, Chicken Recipes curry | Simple | Easy Chicken recipe | Quick & Easy Chicken Recipes | Chicken indian style | Yummy Chicken, delicious chicken, easy chicken recipes, how to make tandoori Chicken at home without tandoor

Prep time
20 mins
Cook time
30 mins
Total time
50 mins
Servings: 2-3
Author: Neha Sharma

Ingredients-

  • Chicken- 12 pieces
  • Curd/Dahi- 200 gms
  • Butter- 1 tbsp
  • Garam Masala- 1 1/2 tbsp
  • Turmeric- 1 tbsp
  • Red Chilli powder- 2 tbsp
  • Ginger Garlic Paste- 2 tbsp
  • Kasoori Methi- 1 tbsp
  • Oil- 2 tbsp
  • Salt- To taste
  • Charcoal- 1
  • Onion- 1 thinly sliced (for garnishing)
  • Lemon Wedges (for garnishing)

Method-

  1. Make deep cuts into the chicken pieces.
  2. In a bowl, add the chicken pieces, Curd, kasoori methi, turmeric powder, garam masala, red chilli powder, Ginger Garlic paste, and salt for marination.
  3. Keep it aside for 30 minutes.
  4. After 30 minutes, in a non-stick pan heat oil and butter.
  5. Place the chicken pieces inside the pan (do not overlook the pan).
  6. Cook each side until you get a nice golden brown colour, it will take about 15 minutes.
  7. Once all the chicken pieces are done, burn the charcoal on stove top until it turns red in colour.
  8. Place a small steel bowl/katori inside the chicken bowl or wherever the cooked chicken is placed, put the red charcoal in the steel bowl. (Use a steel chimta/tong while burning and placing the coal in steel bowl).
  9. Drizzle some oil on the coal and cover the chicken bowl with lid for 2 minutes so that it can retain the smokey flavour.
  10. After 2 minutes take out the steel bowl and garnish the tandoori chicken with chaat masala, sliced onion, lemon wedges and some kasoori methi.
  11. Serve immediately. 

Notes:

* Make sure the chicken is dry and clean.
* You can skip the coal part if you are comfortable eating chicken without the smokey flavour.
* You can also use coriander leaves for garnishing.
* Gently rub the kasoori methi between your palms and then use it to get the maximum flavour and aroma. 

Low Carb Fish Curry Recipe/ Ketogenic Fish Curry Recipe

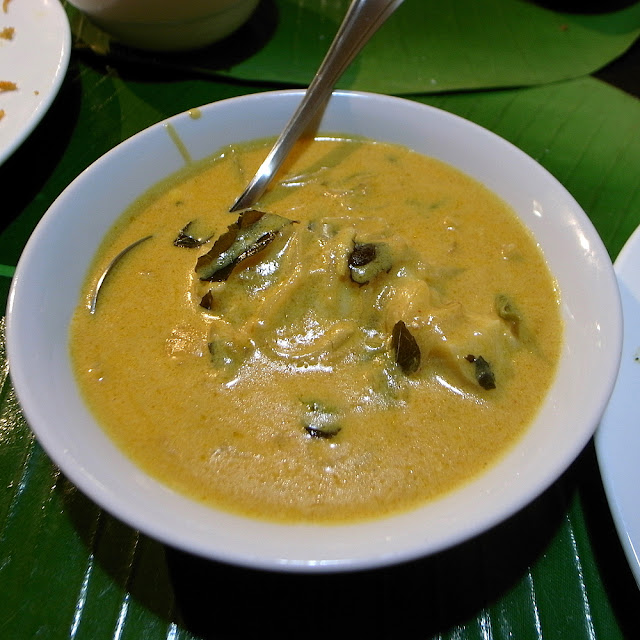
This low Carb Fish curry recipe is a very healthy option for those who are planning to shed some calories or weight. This recipe is from sri-lankan cuisine and is ketogenic friendly. It does not require alot of time or efforts in preparing this delicious dish and can be served with rice or chapati as a main course. 

Low Carb Fish Curry Recipe,Boiled Fish without oil recipe | Boiled fish recipe | Poached fish recipe | Dinner ideas, indian food, quick recipes, popular indian food recipe, recipes,Boiled Fish without oil recipe | Boiled, fish recipe | Poached fish recipe | Dinner ideas, indian food, Low Carb Fish Curry Recipe, popular indian food recipe, quick recipes, recipes,

Prep time
15 mins
Cook time
25 mins
Total time
40 mins
Course: Main Course
Servings: 4
Author: Neha Sharma

Ingredients-

  • Silver Hake/ Indian Butter fish/Pomfret or any other white fish- 900gms
  • Green chilles- 2 (Chopped)
  • Fresh ginger garlic paste- 1 1/2 tbsp
  • Coconut Oil- 4 Tbsp
  • Mustard seeds- ½ tbsp
  • Cumin (Jeeta) Powder- ¼ tbsp
  • Garam Masala/Curry powder- 1 tbsp
  • Turmeric powder- 1/2 tbsp
  • Onion- 1 (fine chopped)
  • Full fat coconut milk- 1 1/2 cup
  • Curry leaves- 5 to 6
  • Sea Salt- to taste
  • Fresh coriander (Chopped)- 1/4 cup
  • Water- 1/2 cup

Method-

  1. Heat 2 tbsp of coconut oil in a big pan.
  2. Add the mustard seeds, stir for 1 minute or until it starts popping.
  3. Add chopped onion, ginger garlic paste and saute for 5 minutes.
  4. Add green chillies, cumin powder, turmeric and cook for another 5-8 minutes.
  5. Add the coconut milk, salt and curry leaves, bring it to a boil then simmer the flame for about 15 minutes.
  6. In another non stick pan heat the remaining 2 tbsp oil.
  7. Fry the fish in it for about 4 minutes.
  8. Now add the fish to the curry sauce, and cook for another 5 minutes on a low flame.
  9. Add chopped coriander.
  10. Serve hot.

Notes:

* While frying the fish be careful not to break it.

3 Ingredients Home-made Ice-Cream 

This is a wonderful recipe of preparing delicious ice cream at home with just 2 major ingredients. This recipe lets you add your favourite flavour and can be made in no time.

Home-made ice-cream, Traffic Jam Monster Sundae Recipe| Sundae recipe|ice cream recipes, how to make ice cream at home, easy and quick ice cream recipe, vanilla and strawberry ice cream, ice cream at home, kulfi at home, kulfi faluda at home, how to make ice cream quickly

Prep time
20 mins
Cooling time
6 hours
Total time
6 hours 20 mins

Course: Dessert 

Servings: 3

Author: Neha Sharma

Ingredients-

  • Condensed milk- 1 Can (Chilled) 
  • Whipping Cream- 2 cups (Chilled) 
  • Oreo Biscuits- 2

Method-

  1. Add the chilled cream to the bowl and whisk until soft and fluffy or stiff peaks form.
  2. Add 1 tbsp of vanilla essence (optional).
  3. Once the cream is fluffy add condensed milk into it. 
  4. Whip until the mixture is thick and fluffy.
  5. The ice cream base is ready. 
  6. Crush 2 small chocolate brownies and 2 oreo biscuits add it to your ice cream base. 
  7. Place in a large container cover it up with aluminium foil/Cling wrap and freeze overnight or atleast 6 hours.

Note:

* You can add flavors to your ice cream as per your choice like Choco chips, Tutti Fruity, dry fruits etc.
* Use a hand blender to whip the cream on medium.

Chicken Masala Recipe | Fried Masala Chicken Recipe 

Chicken Masala is a dry chicken recipe which can be served with naan/parantha/chapati. It tastes very delicious and can be prepared very quickly with ingredients which are already available in our kitchen. 

Chicken Masala Recipe | Fried Masala Chicken Recipe, Chicken curry | Simple | Easy Chicken recipe | Quick & Easy Chicken Recipes | Chicken indian style | Yummy Chicken | 2018 recipes, how to make dry Masala Chicken, home made chicken

Prep time
10 mins
Cook time
20 mins
Total time
30 mins
Course: Main Course
Servings: 2-3
Author: Neha Sharma

INGREDIENTS:

  • Chicken- 1/2 kg (500 gms) 
  • Onion- 3 (Grated)
  • Green chillies- 2 (Chopped)
  • Tomatoes - 3 (Pureed)
  • Ginger Garlic Paste - 4 tbsp
  • Coriander/Dhaniya leaves (Chopped) - for garnish
  • Kashmiri Red Chilli powder- 1 tbsp
  • Coriander powder- 2 tbsp
  • Garam masala powder - 1 tbsp
  • Turmeric powder - 1 tbsp
  • Dry kasuri Methi- 1/2 tbspOil - As required
  • Cashew paste - 2 Tbsp (optional)
  • Salt - to taste
  • Cream - for garnish (optional)

Method-

  1. Heat oil in a pan, Add grated onions and green chilli; fry till onion changes its colour to light brown (you can also add salt to speed up the process).
  2. Now add ginger garlic paste and saute for 1-2 minutes.
  3. Once done add the pureed tomatoes, turmeric, red chilli powder, garam masala, dhaniya powder, salt and cook well until it starts leaving oil(Avoid adding salt if already done in Step-1).
  4. Then add 1/2 cup water, chicken and kaju paste (If using), let it cook for 15 mins on low flame while stirring in between.
  5. After 15 minutes, take kasoor methi and rub it softly between your hands and add it to the masala, stir and cook for 1 minute. 
  6. Garnish it with fresh cream and coriander leaves. Enjoy!! 

Notes-

* You can also fry the chicken before adding it to the masala.
* You can also use whole spices if you want.

Mushroom Fried Rice Recipe | Indo-Chinese Fried Rice Recipe

mushroom fried rice recipe - stir fried chinese style fried rice with mushrooms, delicious indo chinese fried rice, spicy fried rice, fried rice without egg, egg fried rice, quick and simple fried rice recipe, spicy mushroom fried rice, Yummy fried rice, quick fried rice, easy simple fried rice
Prep time
15 mins
Cook time
15 mins
Total time
30 mins
Course: Main Course
Author: Neha Sharma

Ingredients-

  • Basmati rice- 1 cup 
  • Button mushrooms- 250 gms (Chopped) 
  • Ginger Garlic paste- 2 tbsp 
  • Onion- 2 (finely chopped) 
  • Soy sauce- 1 tbsp
  • Vinegar- 3 tbsp 
  • Oil- 3 1/2 tbsp 
  • Salt- To taste 
  • Red Chilli powder/Chilli flakes- 1/2 tbsp 
  • Fresh Coriander/Dhaniya leaves- 1/2 tbsp 
  • Water- 6 cups 

Method-

  1. Wash rice till water comes clear and soak for atleast 15 minutes. 
  2. Cook the rice in 6 cups of water with 4 to 5 drops of oil and some salt. Rice should be 90-95% cooked or al dente.
  3. Drain the rice in a strainer or colander and keep aside. Let the rice cool completely before following the next steps. 
  4. Take a kadai/wok, heat oil in it. Add the ginger garlic paste and onions, on a high flame saute for 2 mins.
  5. Add the chopped mushrooms, stir fry on a high flame till the mushrooms begins to change its colour to light brown. 
  6. Add 3 tbsp of vinegar, chopped coriander leaves and saute for a minute.
  7. Now add soy sauce, chilli flakes/red chilli powder and salt. Stir
  8. Add the cooked rice to the mixture. Stir gently. Cook mushroom fried rice for 2-3 minutes.
  9. Serve hot. Enjoy!! 

Notes:

  • Do not cook the rice till it becomes too soft or mushy.
  • Balance the salt accordingly.

Coconut-Jaggery/Gudd Ladoo/Laddu |Coconut-Jaggery Balls|Narkel Naru Recipe

Coconut-Jaggery Ladoo/Laddu recipe is a traditional dessert from Bengal. It is very easy and simple to make. This recipe is made and served as a traditional food/dessert on various festivities in Bengal. 


Coconut-Jaggery Ladoo/Laddu |Coconut-Jaggery Balls, Ladoo recipe, indian sweets recipes, indian festival sweets recipe, narkel naru recipe, how to make coconut Ladoo, how to make nariyal bari, nariyal bari, nariyal mithai
Prep time
15 mins
Cook time
10 mins
Total time
25 mins
Course: Sweets, Dessert
Author: Neha Sharma

Ingredients-

  • Grated/Desiccated Coconut- 2 cups
  • Grated jaggery/Gudd- 1 cup
  • Cardamom/Elaichi powder- 1/2 tbsp
  • Dry fruits- 1/2 cup (As per your choice/availability) 
  • Kevda water/Rose water- 1 tbsp
  • Desi ghee/Ghee- for greasing

Method-

  1. Dry roast grated/desiccated coconut on medium low flame in a pan while stirring continuously.
  2. Add grated jaggery/gudd and stir to mix everything. Cook till moisture evaporates and mixture leaves pan smoothly for about 6 to 7 minutes (do not cook it for much longer otherwise ladoos will become hard).
  3. Add cardamom powder, dry fruits and kevda water (if using) and mix it well.  
  4. Let the mixture cool down completely before following the next step.
  5. Rub little bit of ghee in your palms, take small sized portions from the mixture and make the ladoos. Keep them on a greased plate.
  6. Follow the same process with rest of the mixture quickly before it dries up.
  7. Ladoos are ready to be eaten. Enjoy!!

Notes:

* Store the ladoos in an air-tight container in refrigerator.
* You can also use Sugar/Condensed milk inspite of using jaggery.  

Quick and Simple Tawa Chicken Recipe 

Tawa Chicken is a very simple recipe and is generally prepared and classified as a street food. This dish belongs to North India and it does not require a lot of ingredients. 


Quick and Simple Tawa Chicken Recipe, Chicken, tawa chicken, Yummy Chicken recipe, quick chicken recipe, Chicken Recipes, restaurant style tawa chicken

Prep time
20 mins
Cook time
20 mins
Total time
40 mins
Course: Main Course
Servings: 2-3
Author: Neha Sharma

Ingredients:

  • Chicken - 500 gms
  • Onions(finely chopped) - 2
  • Tomato(pureed) - 1 1/2 
  • Ginger Garlic paste - 2 tbsp
  • Green chillies-2
  • Methi dana (fenugreek seeds) - 1 tbsp
  • Turmeric - ½ tsp
  • Kashmiri Red Chilli powder - 2 tbsp.
  • Garam masala powder - 1 1/2 tsp (you can reduce the quantity as per your taste) 
  • Capsicum (chopped in cube shape) - 2
  • Onion(chopped in cube shape)- 1
  • Red chilly (Saboot lal mirch)- 2
  • Lemon juice - 1 1/2 tsp
  • Coriander leaves - for garnish
  • Salt - to taste
  • Oil/Butter for cooking

Method-

  1. Take some oil/butter in a pan. Add methi dana and saute for 1 minute on a low flame.  
  2. Add finely chopped onion and salute them until onion becomes light pink. 
  3. Once done, add ginger- garlic paste and green chillies (chopped). Saute for 2 more minutes. 
  4. Add pureed tomatoes, plus all the spices (turmeric, chilli powder, garam masala powder) add 2 Tbsp of water and Saute on low flame. 
  5. Then add chicken, lemon juice and wait for the chicken to cook completely
  6. After the chicken is cooked, add capsicum and onion (chopped in cubes) and saboot red chilly. 
  7. Cook for another 2 minutes, add chopped coriander leaves and 1/2 tbsp of lemon juice. 
  8. Serve hot. Enjoy!! 

Notes:

* While garnishing sprinkle bhuna jeera powder on top. 
* You can also add fresh cream. 
You can also marinate the chicken with salt, lemon juice and turmeric powder.

Chilly Garlic Cheese Burst Parantha

Breakfast, Cheese, Guest Posts Paratha, indian recipes, cheese burst, brunch, chilly, garlic, mozarella,

Prep time- 15 mins
Cook time 15 mins
Total time- 30 mins
Cuisine- North Indian
Serving- 4
Author- Neha Sharma

Ingredients-

For Dough:

  • Atta/Wheat flour- 3 cups
  • Salt to taste

For Stuffing:

  • Paneer/Cottage Cheese-1 1/2 cup grated
  • Mozzarella Cheese (crumbled) - 1 cup
  • Green Chillies- 3 to 4 (chopped) 
  • Garlic- 10 to 12 cloves (chopped) 
  • Turmeric- A pinch
  • Garam masala- 1/2 tbsp
  • Salt to taste

Method

  1. Mix all the ingredients for the stuffing together until combined. 
  2. Add the flour and salt in a bowl. Combine.
  3. Add enough water to make it into a soft dough. Let it rest for about 10-15 mins.
  4. Now take a small portion from the dough. Pat it with little flour
  5. Using a rolling pin, roll it out into a small circle.
  6. Take small amount of stuffing and place it in the middle of this circle.
  7. Now bring the sides of the dough above the stuffing to enclose it.
  8. Pinch the top to keep the stuffing in. Pat it down with your palm. Sprinkle some flour on top and roll it gently to make a flatbread/Chapati.
  9. Drop this on a hot (med-high) skillet/tawa. Add few drops of oil around the sides. 
  10. In a minute, check the underside for brown spots. Turn over the other side. Cook likewise.
  11. Your chilly garlic paranthas are ready. Serve hot. 

Notes:
*You can change the stuffing ingredients and spice level as desired.
*Serve the parantha hot otherwise they will chewy.
*Make sure to use only little salt for both the cover and filling. Otherwise together it might taste too salty.
*Keep the stuffing mixture in the fridge until you are ready to use. 

Name

About Me

photo

Hello! My name is Neha Sharma. I am Passionate about cooking and travelling.It's inspirational, challenging, creative and a great stress buster.
Learn More →


Featured

Blog Archive